Part 1 here:
Part 1 - Starting Point
Part 2: Design
One of the most fun parts of the backyard garden re-do was figuring out a planting scheme and doing the landscape design. I did the basic design myself, with some additional touches suggested by the various landscapers that bid the project. I want to document some of the plans I came up with...
I started by measuring the whole yard, so I could make a to-scale drawing of the thing. I also wanted to be able to estimate things like fencing length, planting areas, etc, to help with estimating the costs. I used an ultra-sonic measure device, which was way easier to use than a long measuring tape, especially around all the weeds/hill/walls. Once I had all the basic measurements, including for the (existing) patio, I drew it up on graph paper, and made several copies.
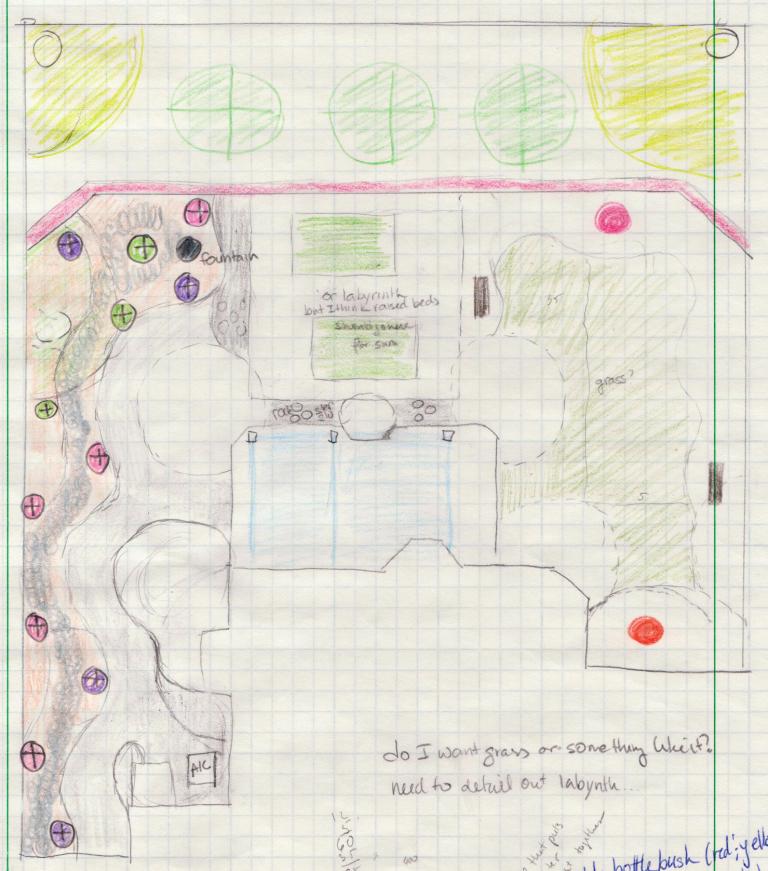
The first plan I came up with looked like this:
 |
| First Backyard Plan |
It involved a lot of squares. I knew I wanted to extend the dry river bed that's in the front yard to tie it to the back yard. I also knew I wanted to limit any turf in the backyard - i.e. minimize grass. And I knew I wanted raised beds or planters of some sort. I'd been keeping track of sun patterns for a while to see which areas got the most sun. The back of the house faces west, so pretty much all of the backyard is either full sun or half sun. This is one of the few plans that show a labyrinth - I've always thought they were cool and wanted one, but it really didn't fit that well.
The next version of the plan reflects that I realized most things in nature don't grow in straight lines:
 |
| Second plan - extending the dry river bed |
This plan also extends the dry creek bed to take over the entire south side of the yard. The different colored circles represent different grasses, which would match the grasses that are in the front yard. I really liked this element, and it started repeating in all the plans. I also started extending the beds on the north side of the house, to reduce the amount of grass or permeable material. For the back slope, I knew I wanted some trees up there - the hope is that they'll grow up and serve as shade trees. I started looking at fruit trees (other than cherry, which is in the front) that do well here.
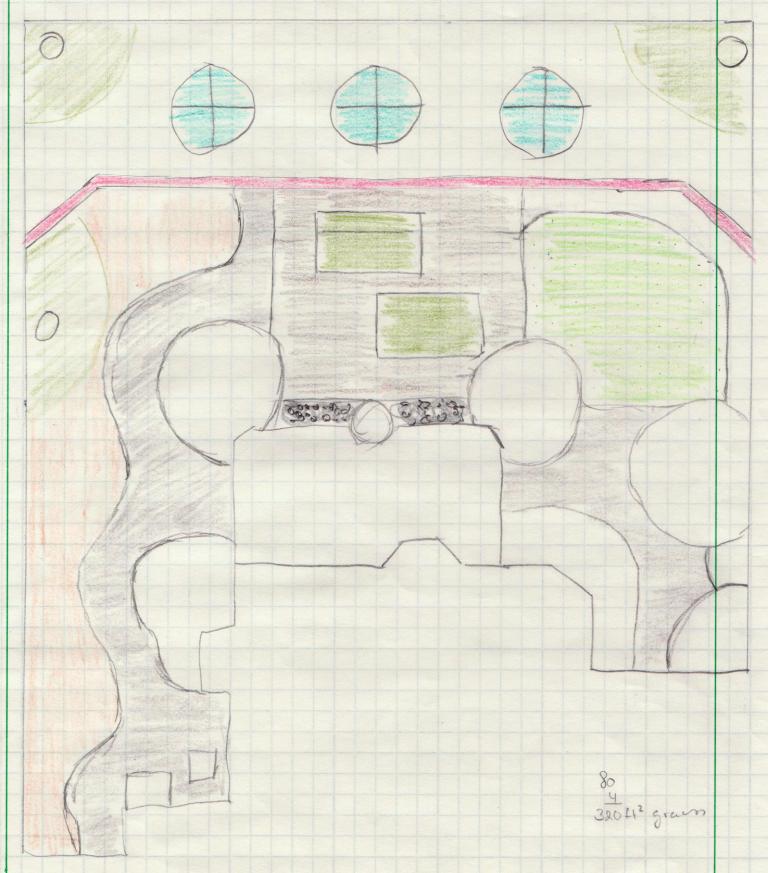
The third plan reduced the "lawn" even further:
 |
| Third Plan - small lawn |
After this version, I realized I didn't really want any lawn in the backyard. There is a (~800 sq ft) lawn in the front, and it requires a lot of upkeep (and water) in the desert. My neighbors don't have any grass in the back yard, and so after talking to some people about real estate issues, I decided to remove the idea of lawn altogether. That version of the plan (basically the green area above shaded grey) was what I took to several landscapers to get bids on. I had decided early one that I was going to do the same process as the front yard - pay someone to do the (massive) cleanup and haul away, redo the sprinklers, hardscape and plant major things like(to be) large trees, while I would do things like plant and finalize drip irrigation etc.
After talking with the landscapers, I added a few things to the plan:
 |
| Final Plan - no colors |
Minor details like a way to get up the slope, and access to the top of the slope. The landscaper suggested railroad ties to build a curved set of steps, and small trails on the slope. It also helps create a flat path on the bottom of the slope. Also, the shape of the curved beds near the patio was adjusted for easier access. The big empty area in the middle is filled with round planters (separate post to follow, because they're cool!), and another landscaper suggested a large bowl on the right side. All the "paving" areas are actually decomposed granite, in a color that matches the decomposed granite path in the front of the house. The dry creek bed is also decomposed granite (a different color), which also matches the front yard. The beds are edged in terra cotta colored tinted concrete, which breaks up the expanses of DG. Here is the final plan with some colors in an electronic version:
 |
| Final Plan - Electronic |
and the colors are fairly representative (except for the teal-ish patio, its really more sky blue). I drew up a bunch more plans of different ideas than what I've included here, but most of them were just variations on a theme. The whole exercise was very helpful - thinking about what would look good, what would work for the environment and what did I want. The bed shapes and sizes were drawn around a couple of different plants, which I'll discuss in the next post...